Sunday, May 5, 2024

Hen & Chicks Block 17 - D4P


Double 4 patch is not all that different from Antique Tile, it is just a four patch rather than a modified four patch in each corner.  

It is easily strip pieced, and except for the center square, everything comes from just one size of strip.  That would make this one a great way to dig into your bins of strips.  I have quite a collection saved up and this would be a fun way to put them all to good use. Start with strips of pink and background. One super long strip will do it, or two or more shorter sets, depending on what you have on hand.  It never hurts to sew extra length on strip sets.  The lengths in the chart all have an extra half inch worked in for safety, but you can make yours longer depending on what is in your scrap bin.  
Sew the pink and background strips together and press toward the pink. Try to keep the strip straight as you press, it makes the cutting more accurate.  
You will need two sizes of sub cuts for this one.  The big one is a square and the little one is the same width as your original strip.  This is the 6 inch finished size and I started with 1.5 inch strips.  That means the big set is 2.5 inches and the little set is 1.5 inches.  Cut 4 of the large squares and 8 of the small units which will be combined to make squares. 
Sew the small units together to make 4 4 patches and iron as you like.  I usually spin the seams on the back of 4 patches, but the key is that the seams should nestle in the next step, so remain flexible depending on how the seam lie.  
Arrange these subunits as seen here. Notice that the pink 4 patches form an X and the pink on the two patch square is away from the background colored center.  Now sew as you would any nine patch, taking care to nestle the seams of the four and two patch units

I have updated the links on the RSC24 Sampler Tab. I hope that everything is correct now, I had a few bad hyperlinks before, so thanks to those who let me know.  Please keep me posted if you find errors.  I somehow went through a phase where all m 12 inch block measurements were too small.  I'm not making 12 inch blocks this year, so it was easy to loose track.  


Saturday, May 4, 2024

Its May!

 A brand new month always means a brand new color at RSC. I have so many pink scraps.  I really thought they were getting under control .  

I thought that using so many pinks in the back of my last quilt would help.  Instead it just moved the fabric from yardage to scraps.  
The big even this weekend was Anna's engagement party.  Jordan reenacted their first date and sailed them to the same beach where they sailed the first time they met. Anna's friend Lily was hiding in the bushes to take photos.  Those will be fun to see!  The wedding is planned for May of 2026, so no rush.  
I hope you have plenty of time to start digging into Pink this weekend.  I sure have a lot to play with, I hope you do to. 


Saturday, April 27, 2024

The End of April

And just like that, we are almost to the end of April.   I am looking forward to digging into the pink bin for May, but first, it looks like I need to square up some crumb blocks to finish yellow stars.  They have made only slight progress this week as I combined smaller chunks of fabric to make larger chunks of fabric.  I think each chunk is big enough though to be a star center, which is the end goal. 
I did spend some time last weekend updating Hen & Chick tutorials.  Please check out the RSC24 sampler tab to links to all pattern pages.   Please let me know if there are any mistakes in the directions.  I found that I had somehow gotten measurements wrong on the 12 inch blocks, so there could be other problems a well that I need to get fixed.    

We are at the end of the year for seniors.  Thursday was their big capstone presentation day and then yesterday was the senior breakfast with many teary eyed speeches by homeroom teachers.  Then they all gathered in the gym to prepare for a group photo.  We will have College Decision day on Wednesday and then it will be all tests all the time until we are done. I found three days in the schedule to help juniors with college applications, which is a huge sign that this year is ready to be done.  Natural cycles with endings and new beginnings is one of the great things about teaching.  I think that I would miss that if I weren't in a school.  

Kurt stayed on in Virginia to work for the week after I came home on Monday and took care of the newly planted seeds.  Several have started to form tiny buds.  This is one of the pear trees.  How sweet is that little guy?  It is glorious spring weather here and I know that summer will descend in a damp hot haze soon enough, so I am soaking up each minute.  

Saturday, April 20, 2024

ScrapHappy Saturday


Monday is a school holiday and we are spending a blissful few days in the mountains chopping wood and planting trees.  Winter was hard and we are busy clearing up downed logs and turning them into fuel for the fire.   We have borrowed a log splitter from our neighbor in exchange for sharing some wood.   
Then the next event of the day will be planting these tiny trees that Anna had shipped from the Virginia department of Agriculture.  We have apple, cherry, pear and paw paw to get settled in.  

I did finally get a real start on yellow.  The Hen & Chick blocks are sewn along with some yellow plus blocks.  I've got partial crumbs to be combined and squared up for star centers and few few hangover purples that were partially assembled when the new month hit.  

Hen & Chicks - Spiral Stairs


This one will be the most complicated blocks this month.  It is still just squares and rectangles, but several of the patches in the nine patch are pieced with three parts each.   These can be strip pieced or sewn from squares.  I like strip piecing and will give total lengths needed with half an inch extra for squaring up.   

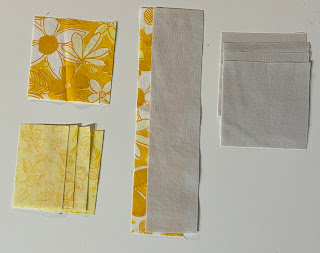
After you gather one dark yellow square, four background squares and 4 light yellow rectangles, you are ready to sew your strip set together and press toward the dark yellow strip.  

Sub-cut the strip set into four segments.  Each of these twosies will be attached to a light yellow rectangle.  The size of the square that you make from these three sections should be the same size as the background and yellow squares.   

Now you have nine units to arrange into your nine patch.  Background squares go in each corner, the dark yellow square forms the center, and the pieced subunits rotate around the central square with the dark yellow squares all touching the dark yellow center square.  

Sew as you prefer for a nine patch and press away from the center.  

Hen & Chicks - Old Maid's Puzzle


Nothing to see here, just HST units and a few background squares.   Please use your method of choice for making the HST units.  I will give you the add 7/8 inch measurements in the cutting chart, though when I make two at a time I always add and inch and square up.  I only do that on the tiny HST blocks though, because I really love my Easy Angle ruler and I like to make everything from the strips that I have lovingly cut and stored in tidy little drawers under my quilting machine.  
 
You will need 6 HST units and three squares of background fabric.  Refer to the cutting chart for specific sizes based on your desired block.   
This is the only truly difficult part of the block.  I got it wrong the first time which is why I had to use photos from the tiny block (the larger size photographs better.   Think about the yellow parts of the HST blocks as all forming groups of three and pointing toward the center.   The background squares march proudly down the center diagonal.  

Now just sew it together as you would any old nine patch.  Just double check the placement before you sew the rows together in case any of the pieces decided to rotate

Hen & Chicks - Petals


This block is inspired by the buttercups of spring.   It is another simple combination of squares and rectangles.  You may choose to use two yellows or three.  I used three.  
Start with two squares of yellow (either the same or different) along with two background squares.  Then you will need two rectangles, one short (two squares minus the seam allowance), the other is the length of the block.  Check the cutting chart to get sizes for the block that you are making.  


First sew the yellow and background squares together to make a four patch.  Yellows are in opposite corners.   
Next, sew the short rectangle to one side of the four patch.   The side with adjacent yellows is where the large rectangle will go.  Press away from the for patch.  

Now sew the long rectangle to the bottom edge and press away from the four patch again.   


Hen & Chicks - Opposing Corners


This one is super simple.   Just rectangles and squares with two different shades of yellow.  This is a block that would make a nice diagonal pattern if done in a full quilt.   


From yellow #1, cut a rectangle and a square.   From yellow #2, cut a rectangle and a square.  Use the cutting chart to determine the size.  The rectangles are the same size as two squares minus two seam allowances.  You will also need 3 squares of background.   

Sew a square of background fabric onto one end of each rectangle.  At the same trip to the, he sewing machine, sew a square of background fabric to either of the yellow squares.  
Unfortunately, it will take a second through the sewing machine to sew the last yellow square onto the other side of background square.   At this point you will press all 4 seams toward the yellow. Check the placement of your subunits at this point.  The background squares should form a diagonal line across the block and each yellow square should touch its matching rectangle

Now sew the three strips together and press away from the center strip.  


Saturday, April 13, 2024

ScrapHappy Saturday - Spring Yellow


Not much yellow went on last week, but I do have a new quilt on the frame.  It has a pieced backing from 10.5 inch squares which took a bit of time.  I still honestly quite low on fabric with enough yardage to make progress with backings and borders.   I will have to keep working on that.   

There seems to be some nice variety of tiny bits in the yellow bin.  Definitely need to finish up some crumb blocks to put those to use.  
The wall is sadly waiting for blocks. I know, it is April 13 already!  Today will be the day.   


If you have a couple of minutes, and have not had a chance, please consider doing a survey for a college business school project on quilting events.

 My daughters BF is in business school working on a class project.  He has a group working to find out the opinions of quilters on the AQS.  If you have a few minutes to take the survey, it would be great!

Florida State AQS Survey


Tuesday, April 9, 2024

AQS Quilting Survey

 My daughters BF is in business school working on a class project.  He has a group working to find out the opinions of quilters on the AQS.  If you have a few minutes to take the survey, it would be great!

Florida State AQS Survey